一、检查系统时间和版本,并安装更新
ntpdate -u cn.pool.ntp.org
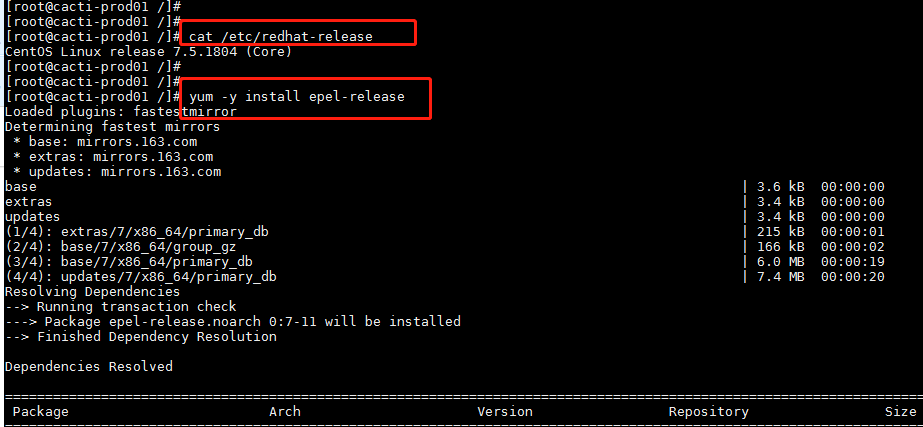
cat /etc/redhat-release
yum -y install nano
yum -y install wget
yum -y install net-tools
#安装更新源
mv /etc/yum.repos.d/CentOS-Base.repo /etc/yum.repos.d/CentOS-Base.repo_bak
wget -O /etc/yum.repos.d/CentOS-Base.repo http://mirrors.aliyun.com/repo/Centos-7.repo
yum makecache

#安装ntp服务,如果时间不对就安装一下,可选项
yum install ntp
systemctl enable ntpd //开机启动服务
systemctl start ntpd //启动服务
timedatectl set-timezone Asia/Shanghai //更改时区
timedatectl set-ntp yes //启用ntp同步
ntpq -p //同步时间
1.1 永久关闭Selinux(不然后面进行Cacti安装时会失败)
nano /etc/sysconfig/selinux
SELINUX=enforcing
#改为
SELINUX=disabled
#必须要重启服务器
reboot
1.2、关闭防火墙,这里选择全部关闭,如果为了安全请自行脑补放开
systemctl stop firewalld
systemctl disable firewalld
二、下载PHP7.2包 并安装 Apache
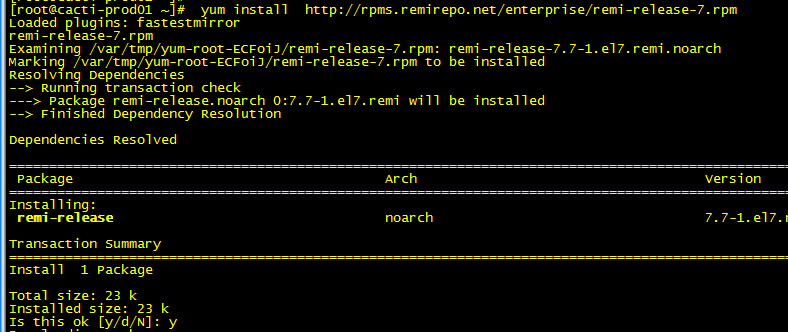
 yum install  http://rpms.remirepo.net/enterprise/remi-release-7.rpm -y
 yum install yum-utils -y
 yum-config-manager --enable remi-php72
 yum -y install httpd httpd-devel
 #开机启动并开启httpd服务
systemctl enable httpd
systemctl start httpd
systemctl status httpd
2.1检查是否安装成功
2.2 进行配置文件的修改,可参考以下网址链接
cd /etc/httpd/conf.d/
nano cacti.conf
#https://github.com/Cacti/documentation/blob/develop/Install-Under-CentOS_LAMP.md
#创建一个cacti.conf的配置文件,把上面网址的配置文件全部复制进来,进行修改
#只需要修改下面备注的三处即可,其它保持默认
# Cacti: An RRD based graphing tool
#

# For security reasons, the Cacti web interface is accessible only to
# localhost in the default configuration. If you want to allow other clients
# to access your Cacti installation, change the httpd ACLs below.
# For example:
# On httpd 2.4, change "Require host localhost" to "Require all granted".
# On httpd 2.2, change "Allow from localhost" to "Allow from all".
 #改成80端口
<VirtualHost *:80>
    LogLevel warn
#改成本机的IP地址
    ServerName 192.168.1.102
    ServerAdmin  admin@yourdomain.com

    DocumentRoot "/var/www/html/cacti"
    Alias /cacti    /var/www/html/cacti
#下面三行注释掉,因为没有ssh证书
    #SSLEngine On
    #SSLCertificateFile /etc/ssl/certs/YourOwnCertFile.crt
    #SSLCertificateKeyFile /etc/ssl/private/YourOwnCertKey.key

    <Directory /var/www/html/cacti/>
        <IfModule mod_authz_core.c>
                # httpd 2.4
                Require all granted
        </IfModule>
        <IfModule !mod_authz_core.c>
                # httpd 2.2
                Order deny,allow
                Deny from all
                Allow from all
        </IfModule>
    </Directory>

    <Directory /var/www/html/cacti/install>
        # mod_security overrides.
        # Uncomment these if you use mod_security.
        # allow POST of application/x-www-form-urlencoded during install
        #SecRuleRemoveById 960010
        # permit the specification of the RRDTool paths during install
        #SecRuleRemoveById 900011
    </Directory>

    # These sections marked "Require all denied" (or "Deny from all")
    # should not be modified.
    # These are in place in order to harden Cacti.
    <Directory /var/www/html/cacti/log>
        <IfModule mod_authz_core.c>
                Require all denied
        </IfModule>
        <IfModule !mod_authz_core.c>
                Order deny,allow
                Deny from all
        </IfModule>
    </Directory>
    <Directory /var/www/html/cacti/rra>
        <IfModule mod_authz_core.c>
                Require all denied
        </IfModule>
        <IfModule !mod_authz_core.c>
                Order deny,allow
                Deny from all
        </IfModule>
    </Directory>
</VirtualHost>
2.3 修改配置文件之后,必须重启一下服务才能生效
systemctl restart httpd
systemctl status httpd
三、安装net-snmp工具,进行监控设备信息的抓取。
yum -y  install net-snmp net-snmp-utils net-snmp-libs net-snmp-devel
systemctl enable snmpd
systemctl start snmpd
systemctl status snmpd
3.1检查安装是否成功
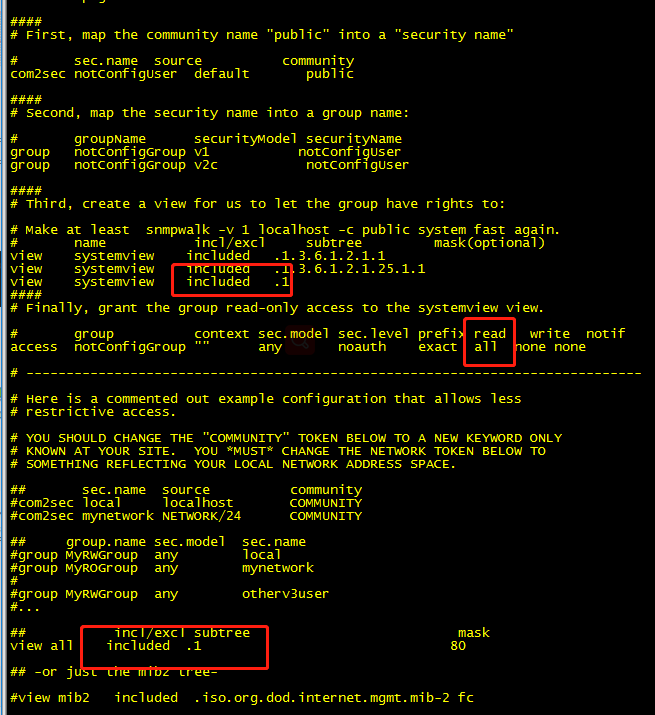
3.2 进行snmp相关配置
nano /etc/snmp/snmpd.conf
#          sec.name       source      community
  com2sec notConfigUser  default       public

#       groupName       securityModel    securityName
group   notConfigGroup      v1           notConfigUser
group   notConfigGroup      v2c          notConfigUser


#       name     incl/excl     subtree         mask(optional)
  view  all      included        .1

#          group        context sec.model sec.level prefix read   write  notif
 access  notConfigGroup ""      any       noauth    exact  all  none none
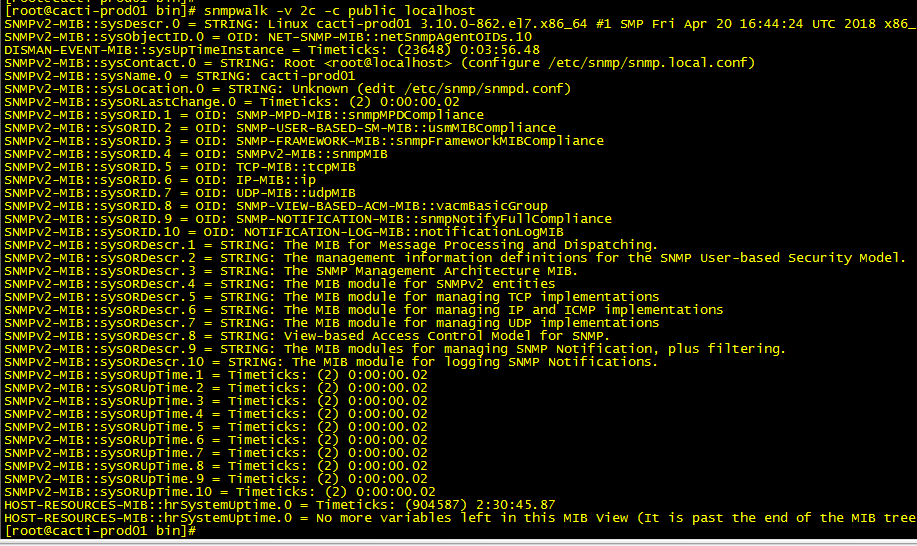
3.3 重启服务并进行简单测试,只要有数据返回,即表示成功。
systemctl restart snmpd
systemctl status snmpd
snmpwalk -v 2c -c public localhost
四、安装数据库:MariaDB10.4
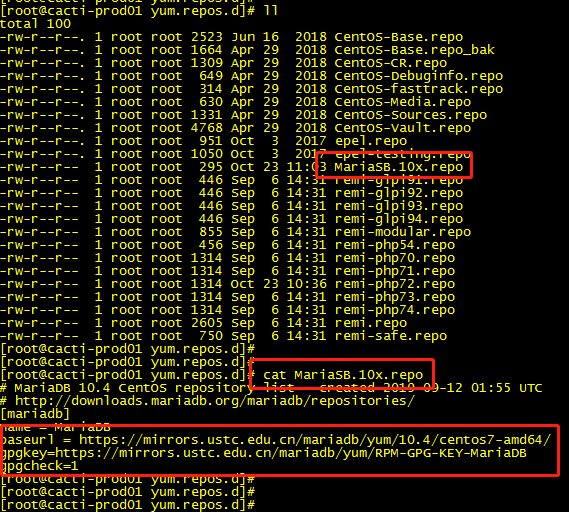
cd /etc/yum.repos.d/
touch MariaSB.10x.repo
nano MariaSB.10x.repo
#把下面的代码放入到上面的这个文件,指定安装的版本为10.4如果不指定,安装的是旧版本
#这里是换成国内的源,如果不换使用国外的速度会慢死人 镜像我换成了阿里云的镜像了

# MariaDB 10.4 CentOS repository list - created 2019-09-12 01:55 UTC
# http://downloads.mariadb.org/mariadb/repositories/
[mariadb]
name = MariaDB
baseurl = https://mirrors.aliyun.com/mariadb/yum/10.4/centos7-amd64
gpgkey = https://mirrors.aliyun.com/mariadb/yum/RPM-GPG-KEY-MariaDB gpgcheck = 1
gpgcheck=1
4.1、清除Yum的缓存并重新建立
yum clean all
yum makecache
cd /
4.2、正式安装mariadb10.4数据库
yum -y install mariadb mariadb-server mariadb-devel MariaDB-client

systemctl enable mariadb
systemctl start mariadb
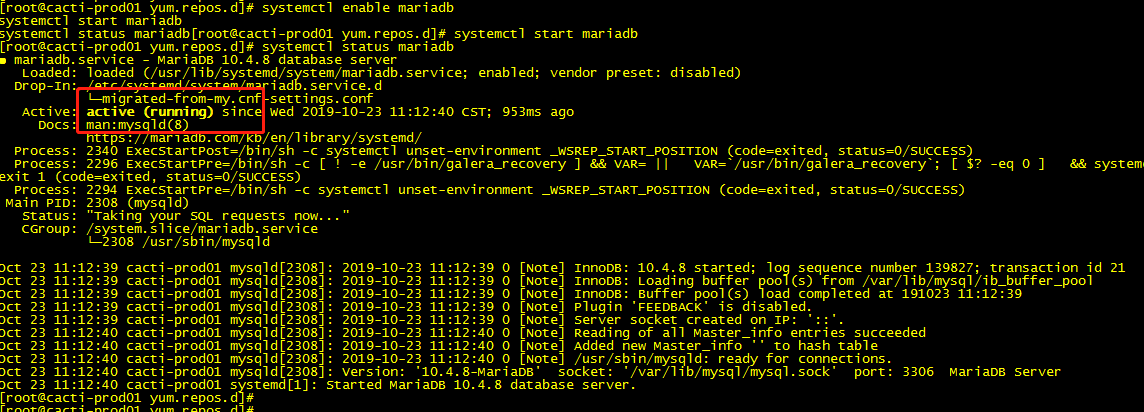
systemctl status mariadb
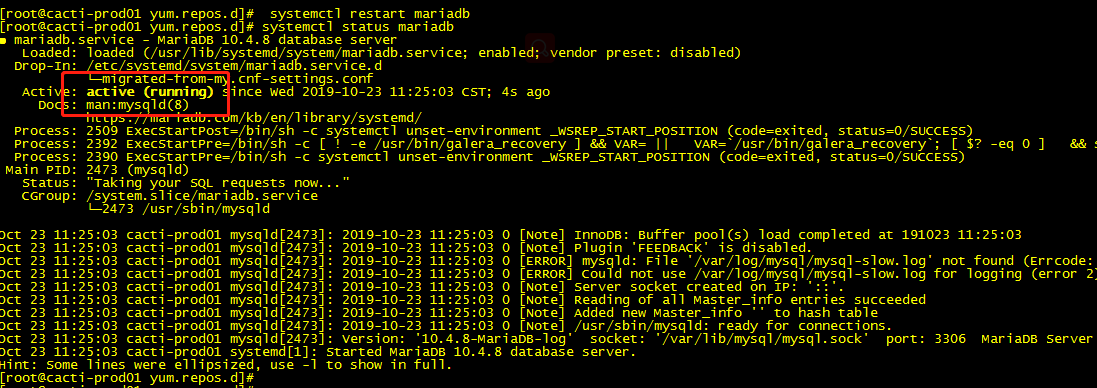
4.3 检查安装是否成功
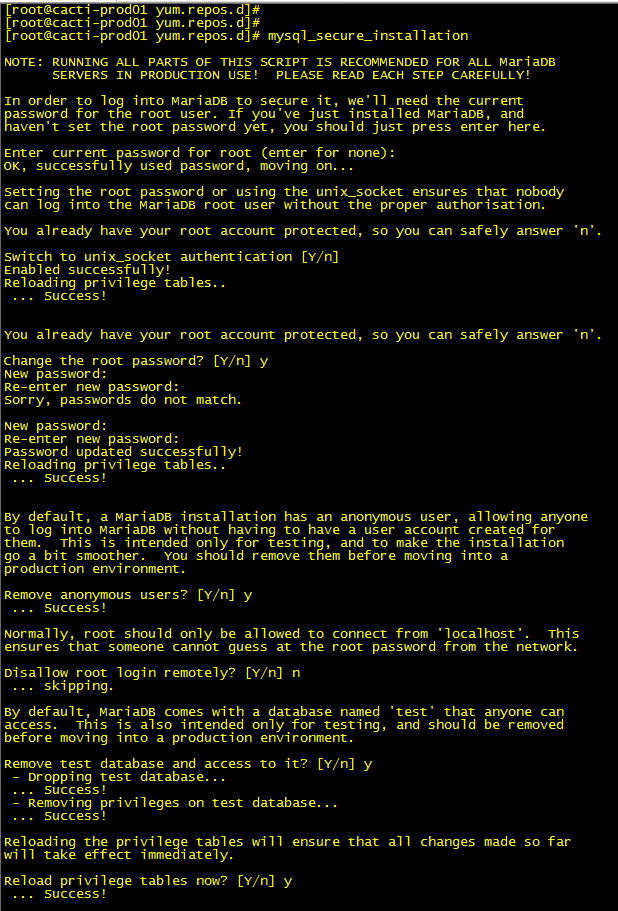
4.4 进行数据库的初始化配置
mysql_secure_installation4.5 登陆数据库,更改远程登陆权限,允许任意用户可以连接到数据库(安全略过)
mysql -uroot -p
GRANT ALL PRIVILEGES ON *.* TO 'root'@'%' IDENTIFIED BY '1qaz2wsx' WITH GRANT OPTION;
flush privileges;
exit;
4.6 更改数据库的默认编码
#把下面这些配置文件全部复制进去即可,如果有问题就不要添加太多,后期安装Cacti时会根据服务器的配置进行相关调整
nano /etc/my.cnf.d/server.cnf
[client]
 default-character-set = utf8mb4
[mysql]
 default-character-set = utf8mb4
[server]
[mysqld]
         character_set_server=utf8mb4
        character-set-client-handshake = true
        character_set_client = utf8mb4
        collation-server = utf8mb4_unicode_ci
        init_connect=’SET NAMES utf8mb4'
        max_heap_table_size = 128M
        max_allowed_packet = 16777216
        join_buffer_size = 128M
        innodb_file_format = Barracuda
        tmp_table_size = 64M
        join_buffer_size = 128M
        innodb_file_per_table = ON
        innodb_buffer_pool_size = 1024M
        innodb_doublewrite = off
        innodb_lock_wait_timeout = 50
        innodb_flush_log_at_trx_commit = 2
        innodb_large_prefix = 1
        log-error                      = /var/log/mysql/mysql-error.log
        log-queries-not-using-indexes  = 1
        slow-query-log                 = 1
        slow-query-log-file            = /var/log/mysql/mysql-slow.log

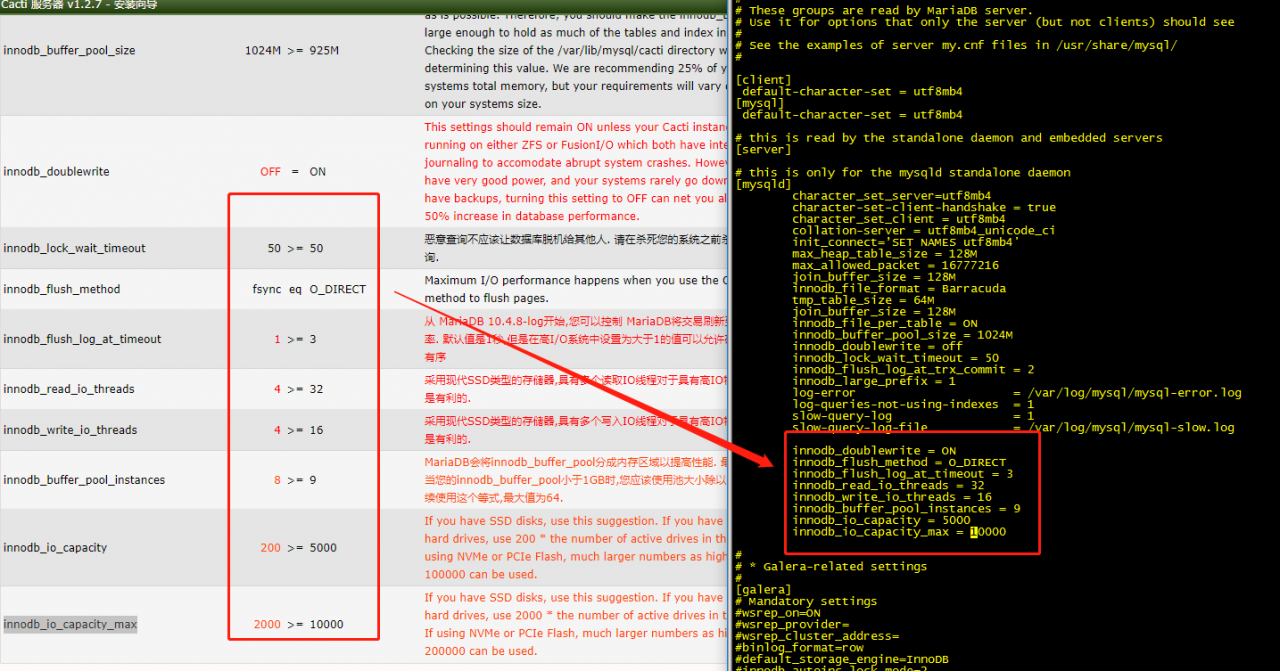
        innodb_doublewrite = ON
        innodb_flush_method = O_DIRECT
        innodb_flush_log_at_timeout = 3
        innodb_read_io_threads = 32
        innodb_write_io_threads = 16
        innodb_buffer_pool_instances = 9
        innodb_io_capacity = 5000
        innodb_io_capacity_max = 10000
4.7 重启数据库服务,使其生效:
systemctl restart mariadb
systemctl status mariadb

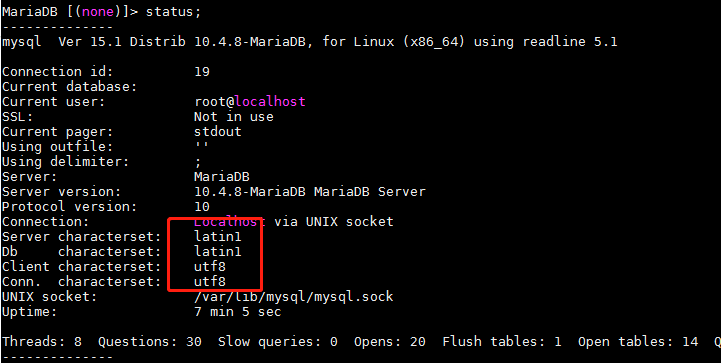
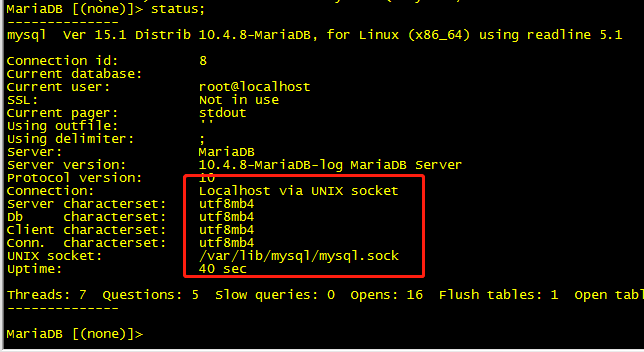
#再登陆数据库,查看一下编码

mysql -uroot -p
status;
exit;
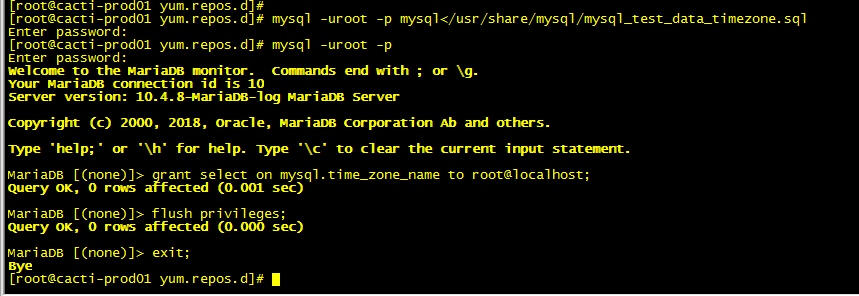
4.8 进行数据库时间更改
#直接运行下面的代码即可;(不需要登陆数据库库))
mysql -uroot -p mysql</usr/share/mysql/mysql_test_data_timezone.sql

mysql -uroot -p
grant select on mysql.time_zone_name to root@localhost;
flush privileges;
exit;
4.9 下载cacti1.2.7安装文件,并解压到相应目录
cd /
mkdir download
cd /download/
#正常的是下载不下来的,因为需要外网环境,所以找个外网下载下来再传进来吧
wget --no-check-certificate https://www.cacti.net/downloads/cacti-1.2.7.tar.gz
tar -xvf cacti-1.2.7.tar.gz -C /var/www/html/
cd /var/www/html/cacti-1.2.7/
cd ..
mv cacti-1.2.7/ cacti
cd cacti/
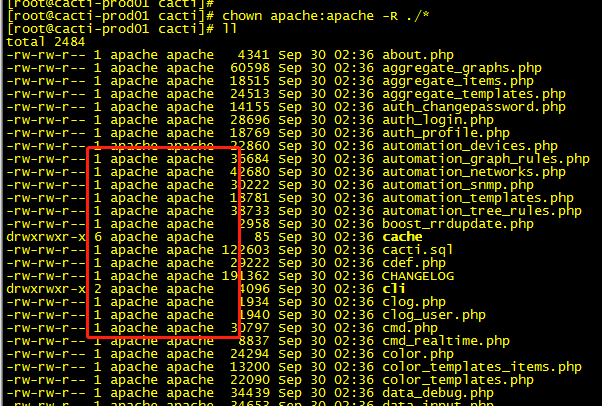
#权限变更
chown apache:apache -R /var/www/html/cacti/
chmod 777 -R /var/www/html/cacti/log/
chmod 777 -R /var/www/html/cacti/rra/
4.10 创建数据库,库名称为cacti
mysql -uroot -p
create database if not exists cacti;  #创建数据库 cacti
use cacti;
source /var/www/html/cacti/cacti.sql #把cacti1.2.7的默认数据库,导入到cacti表
flush privileges;
exit;
#数据库到这一步就全部完成了。
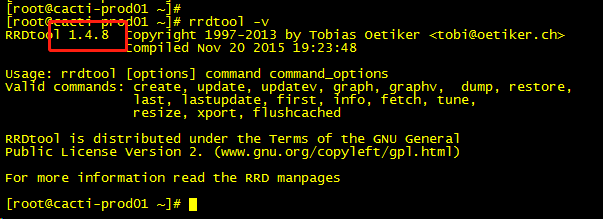
五、安装rrdtool工具,默认安装的是rrdtool1.4.8版本
#在这之前需要安装一些依赖的软件
yum -y install  gcc mysql-devel autautomake libtool dos2unix help2man openssl-devel perl perl-devel rpm-develoconf  libxml2-devel libxml2 pcre pcre-devel pango pango-devel
yum -y install rrdtool
yum -y install perl-rrdtool*
yum -y install perl-DB*
5.1 安装完成后,进行版本查看,后期安装时需要进行选择;
rrdtool -v六.安装php相关模块
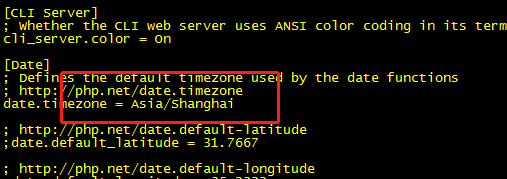
yum -y install php-gmp php-mysql php-pear php-common php-gd php-devel php php-mbstring php-cli php-intl php-snmp php-ldap6.1 进行php时区配置:
nano /etc/php.ini
date.timezone = Asia/Shanghai
memory_limit = 2048M
max_execution_time = 60
七、进行cacti1.2.7安装文件与数据库的设置:
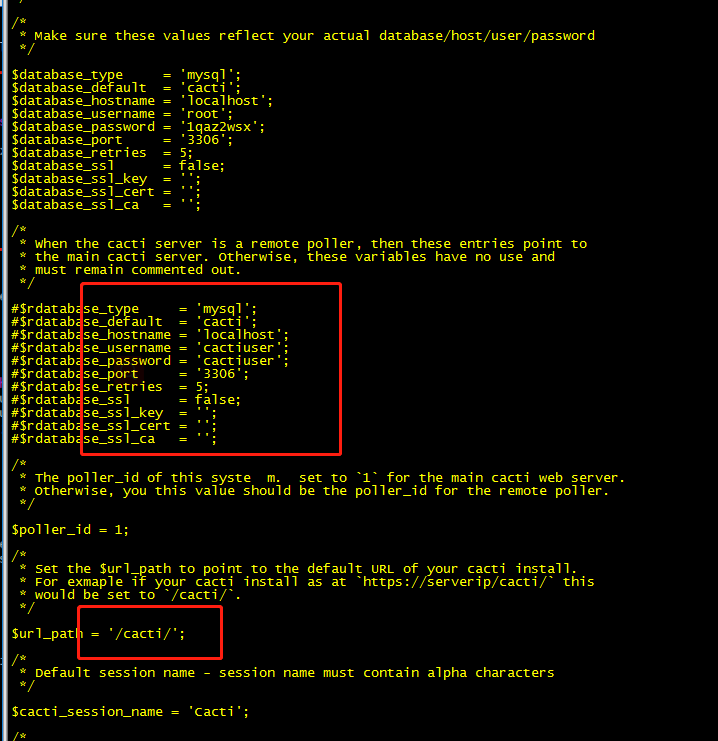
cd /var/www/html/cacti/include/
nano config.php
#下面是需要更改的配置文件部分
$database_type     = 'mysql';
$database_default  = 'cacti';
$database_hostname = 'localhost';
$database_username = 'root';
$database_password = '1qaz2wsx';
$database_port     = '3306';
$database_retries  = 5;
$database_ssl      = false;
$database_ssl_key  = '';
$database_ssl_cert = '';
$database_ssl_ca   = '';

$url_path = '/cacti/';

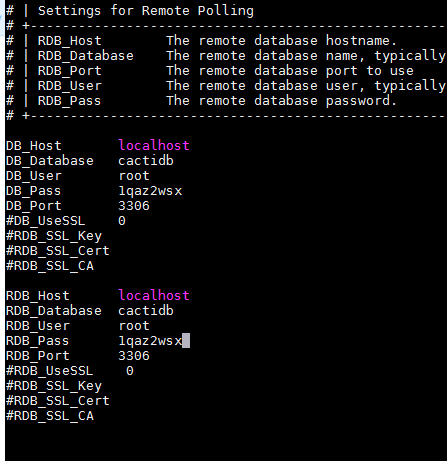
备注:这里的数据信息只需要填写第一处就行了,第二处是用来做集群使用的,后期的第二节课会说到。
八、添加spine定时任务(这里时间是1分钟执行一次):
crontab -e
#在弹出的文档里输入
*/1 * * * * /usr/bin/php /var/www/html/cacti/poller.php > /dev/null 2>&1
#上面这个是采集时间---注意poller的路径
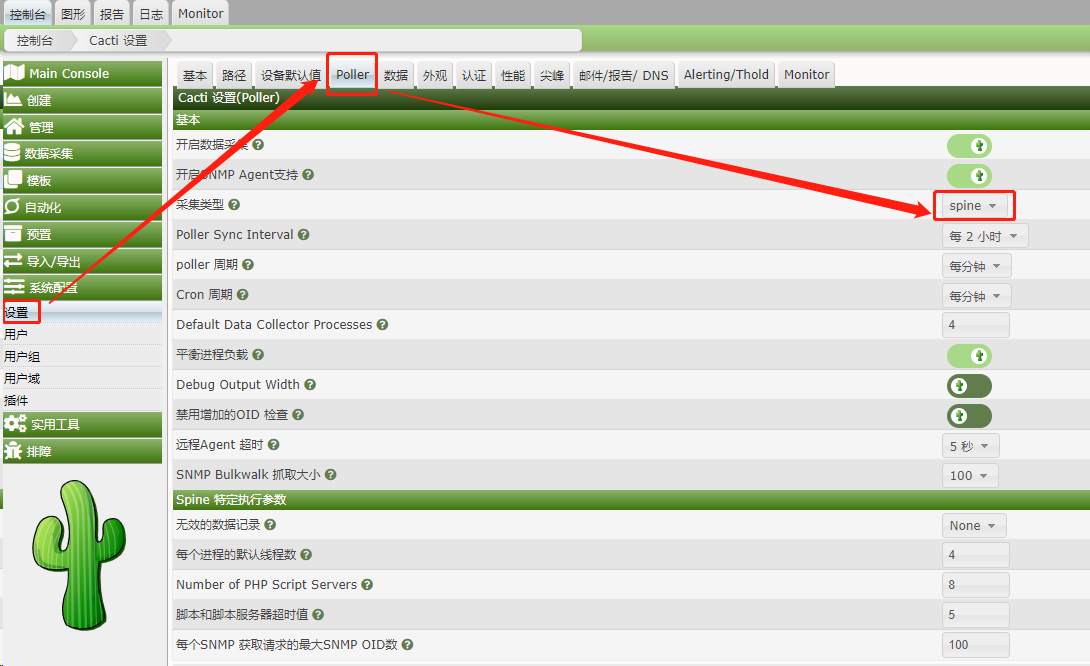
九、安装spine1.2.7(一定要选择与cacti一样的版本),如果不安装默认cacti 使用的是 cmd.php脚本去抓取数据,耗时太久,使用spine可提升10倍速度。
cd /download/
wget --no-check-certificate https://www.cacti.net/downloads/spine/cacti-spine-1.2.7.tar.gz
tar -xvf cacti-spine-1.2.7.tar.gz
cd cacti-spine-1.2.7/
./bootstrap
#这里会弹出相关的一些配置,一定要注意
./configure
 make
 make install
chown root:root /usr/local/spine/bin/spine
chmod u+s /usr/local/spine/bin/spine
cd /usr/local/spine/etc/
cp spine.conf.dist spine.conf
nano spine.conf
cp /usr/local/spine/etc/spine.conf /etc/
#把spine的配置文件复制到/etc/目录下面,不然会出现下面的报错信息
SPINE: Poller[1] PID[2673] FATAL: Unable to read configuration file! (Spine init)
9.1 进行初始化和验证
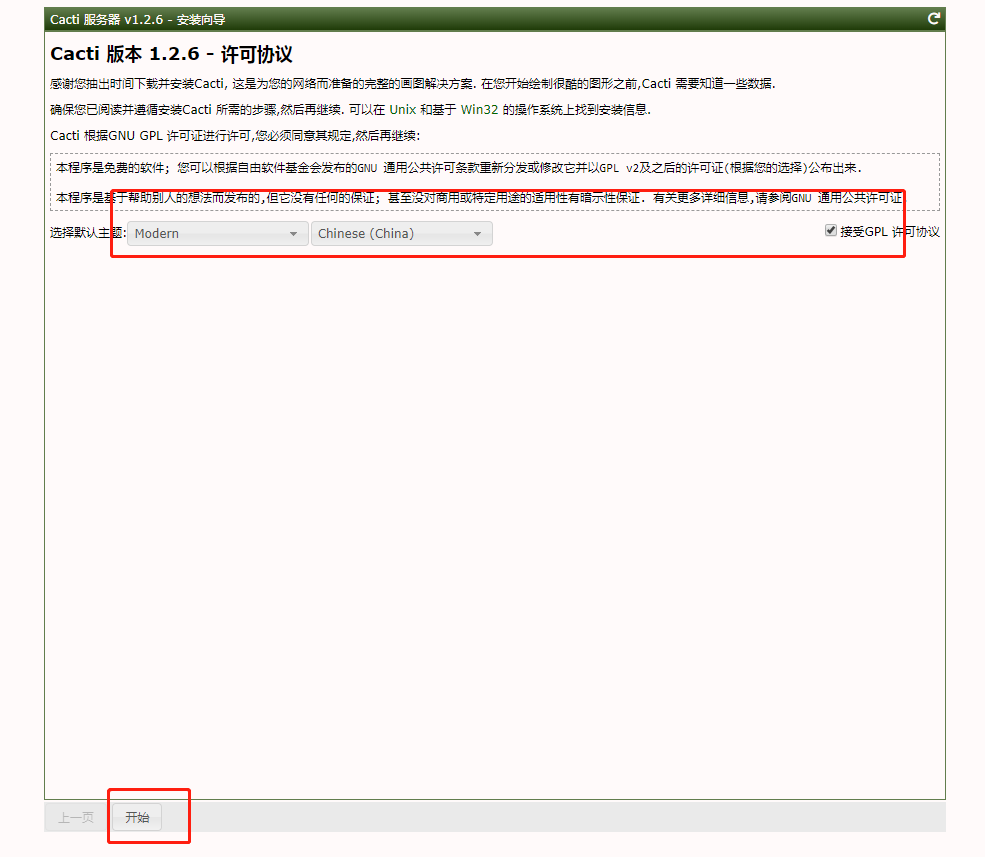
/usr/local/spine/bin/spine十、正式开始cacti1.2.7的安装了,#打开chrome浏览器输入IP地址即可进行安装:
http://你的IP/install/install.php#默认cacti1.2.7的安装用户名和密码都是:
user:admin
password:admin
#输入初始密码之后,必须更改密码才可以下一步
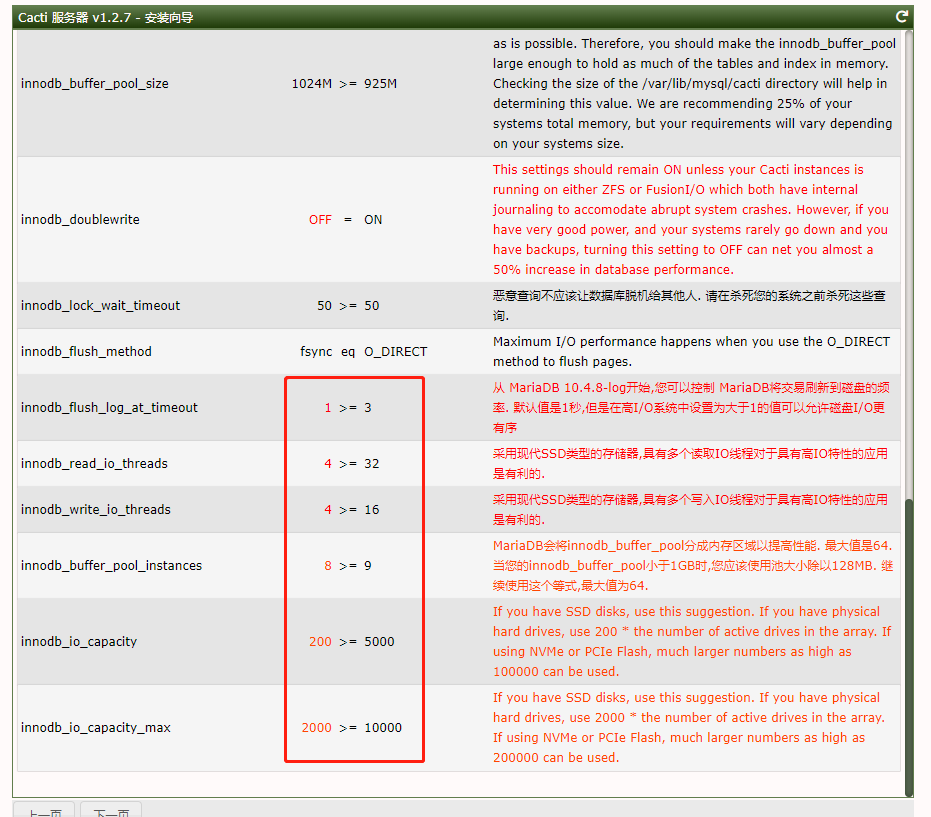
#这些检测全部通过才可以下一步,如果有没有达标的,请自己进行数据库文件的修改
文件路径:
nano /etc/my.cnf.d/server.cnf 修改完成后记得一定要进行服务的重启
systemctl restart mariadb
systemctl status mariadb
这里选择 <新的主要服务器>,第二个选项是做集群时使用到的,第二期会进行到
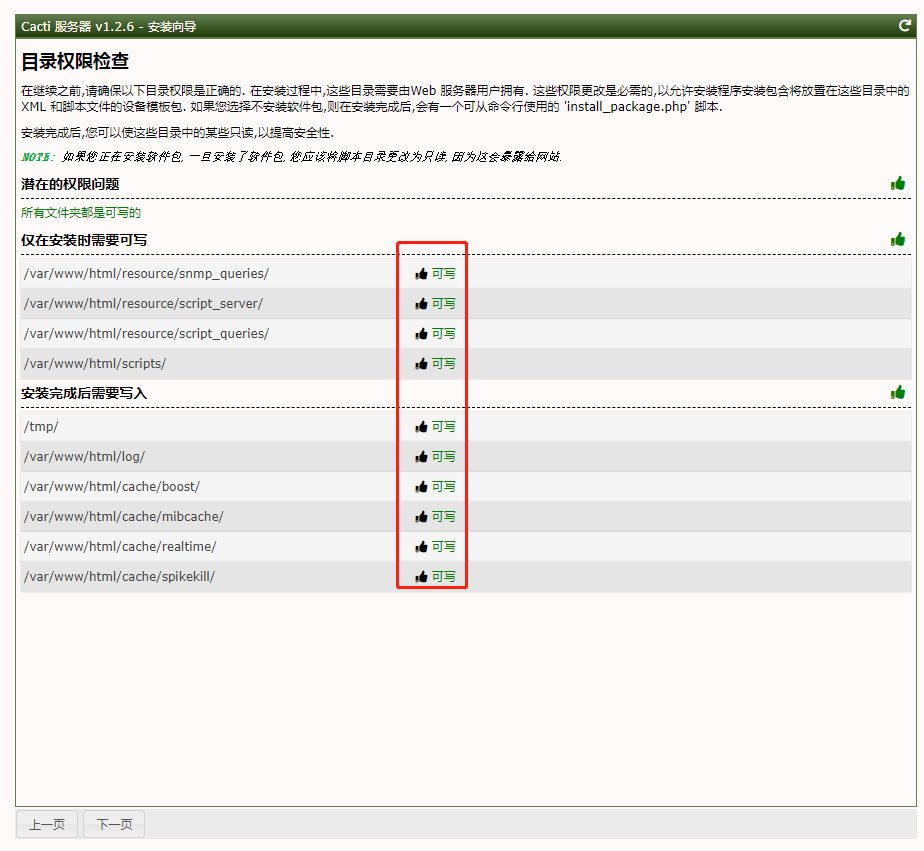
#这里的所有文件 权限必须 可写 才可以进行下一步
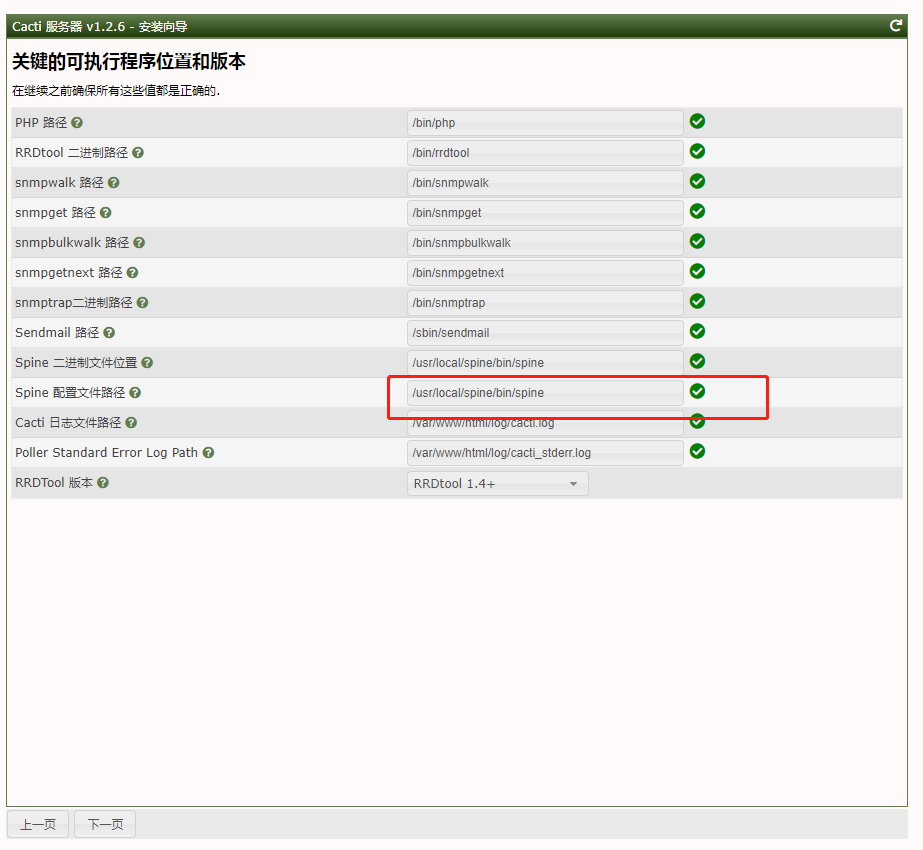
#这个spine的路径有多个,选择其中任意一个都可以使用;
/usr/local/spine/etc/spine.conf
/usr/local/spine/bin/spine
/etc/spine.conf阅读全文
 MrGod的博客








评论前必须登录!
立即登录 注册